model of a joint

Patient Education

Joint Replacement Surgery

At Mississippi Valley Surgery Center, we recognize the importance of education in empowering our patients facing total joint replacement surgery. We firmly believe that being well-informed is not just beneficial but essential for a successful and a positive surgical experience.

We are committed to being a reliable source of information and support for our patients preparing for total joint replacement surgery. We encourage you to explore our resources, ask questions, and embrace the power of education as you embark on this transformative healthcare journey. Together, let’s make informed choices that lead to a future of improved mobility, reduced pain, and enhanced overall quality of life.

Find a Care Partner

Your care partner should plan to be actively involved in your joint replacement journey and read through all the enclosed information with you prior to surgery.

Your care partner should be able to provide support and will need to stay with you during the first three days of your recovery. Your partner should be involved in your physical therapy and keep you focused on healing. He or she will also be a valuable extra set of eyes and ears to help keep you on track with all the information you will be receiving over the next several weeks.

Please note this person should be 18 years or older.

Register for Surgery

After you are scheduled for surgery by the surgeon’s office, you will need to register with the surgery center.  You can click here “register online” and this will take you to our online registration portal, Simple Admit. Next, click “patients start here” and you’ll need the password: MVSC563SURG.  If you are unable to complete your registration online, one of our nurse navigators will reach out to you.

Pre-op Appointments

You may need to have other doctor appointments prior to your joint replacement surgery if you are under the care of any other specialists. (Cardiologist, Pulmonologist, etc.)  The number and type of appointments you have will depend on your medical history.  Your surgeon and his team will guide you in completing many of these details that are needed before your surgery.

Tone up for surgery "Pre-Exercises"

It is important to be as flexible and strong as possible before surgery.
Exercising prior to surgery will help build strength and speed surgical recovery.

  • You will be using your arms more after surgery.  For example: Holding yourself up on your walker, getting up and down from chairs, in and out of your car, on and off the toilet, etc.

Click Here for Preoperative Exercises

Recommendation: Do each exercise 30 times – twice a day. Do these 5-7 days per week as tolerated.  Try to do some additional walking and stationary biking as well to improve endurance.

Home Recovery Preparation

Prepare your home

  • Put food and other supplies you may need in a cupboard that is between your waist and shoulder level for easier reach.
  • Plan and prepare meals before surgery to ensure a well-balanced diet. This is important for the healing process.
  • Purchase or borrow a walker. This is required for surgery.
  • Attach a sturdy bag or a small basket to your walker to hold your phone, a notepad, a pen, and any other things.  DO NOT carry anything when you are walking around as you may need your hands to help you balance.
  • Have clean sheets on the bed the day before surgery and clean pajamas ready at home to reduce the risk for infection.

Helpful Items

Other items that may be helpful, but not required:

  • Shoehorn with a long handle
  • Reacher to help you pick up things from the floor, put on your pants, and take off your socks
  • Sock aid to help you put on your socks
  • Shower sponge with a long handle
  • Grab bars in the bathroom to allow you to steady yourself – DO NOT USE TOWEL RACKS AS GRAB BARS
  • Toilet seat riser and shower chair

Avoiding Falls

  • Pick up throw rugs.
  • Move cords out of high traffic areas.
  • Declutter the house.
  • Make easy paths for walkers/canes in high traffic areas (i.e. to the bathroom, kitchen, etc).
  • Have night lights placed in hallways and rooms that can be dark.
  • Pets that are small or move around quickly may cause you to trip. For the first few weeks you are home, consider having your pet stay with a friend or at a kennel.

Manage Your Medications

Medications That May Increase Bleeding

Your doctor should tell you when to stop any medications before surgery. Check with your surgeon for when to stop any anti-inflammatory medications such as Ibuprofen, Motrin­, Naproxen, Vitamin E, fish oil, etc. These medications may increase bleeding.  In some cases, patients might keep taking Aspirin.  If you are taking a blood thinner, you will need instructions from the ordering physician for stopping the medication. Your surgeon will instruct you when to restart your blood thinner after surgery.

Herbal Medicine

Herbal medicines and supplements can interfere and interact with other medicines. Check with your doctor to see if you need to stop taking your herbal medicines before surgery.

Pre-Surgery Checklist

🗹 Pick up your post-op prescription medications ordered by your surgeon from your pharmacy when they are ready. (usually 1-2 days before surgery)

🗹 Schedule your post-op physical therapy appointments prior to surgery to get appointment times that work best for you.

🗹 Purchase your over the counter medications and required items before surgery.  (listed in your surgery folder from the office)

🗹 Contact your surgeon’s office if you would like to purchase an electric ice machine.

🗹 Stay away from anyone who is sick.

🗹 Do NOT shave your operative leg for at least 5 days before surgery.

🗹 No pedicures – to prevent cuts or open areas on your feet.

🗹 Remove any polish from toenails and fingernails.

Start Healthy Eating for Healing

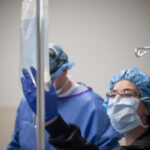
How you treat your body the weeks before and after surgery can have a direct effect on how well and how quickly you will heal. Now is the time to take a proactive approach and give your body the building blocks it needs for the best possible recovery. A little preparation now can make a big difference in your recovery later. Rather than waiting until after your surgery, start the healing now! Simple steps you can take include:

  • Begin your healthy eating plan as soon as you are scheduled for surgery.
  • Eat a well-balanced diet rich in iron, Vitamin C and calcium.
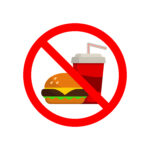
  • Avoid alcohol especially in the 48 hours prior to surgery.
  • Avoid smoking before and after surgery.

IMPORTANT NOTE: If you are diabetic or on any type of restricted diet, you should consult your doctor prior to starting any new diet.

Importance of Food Enriched with Calcium

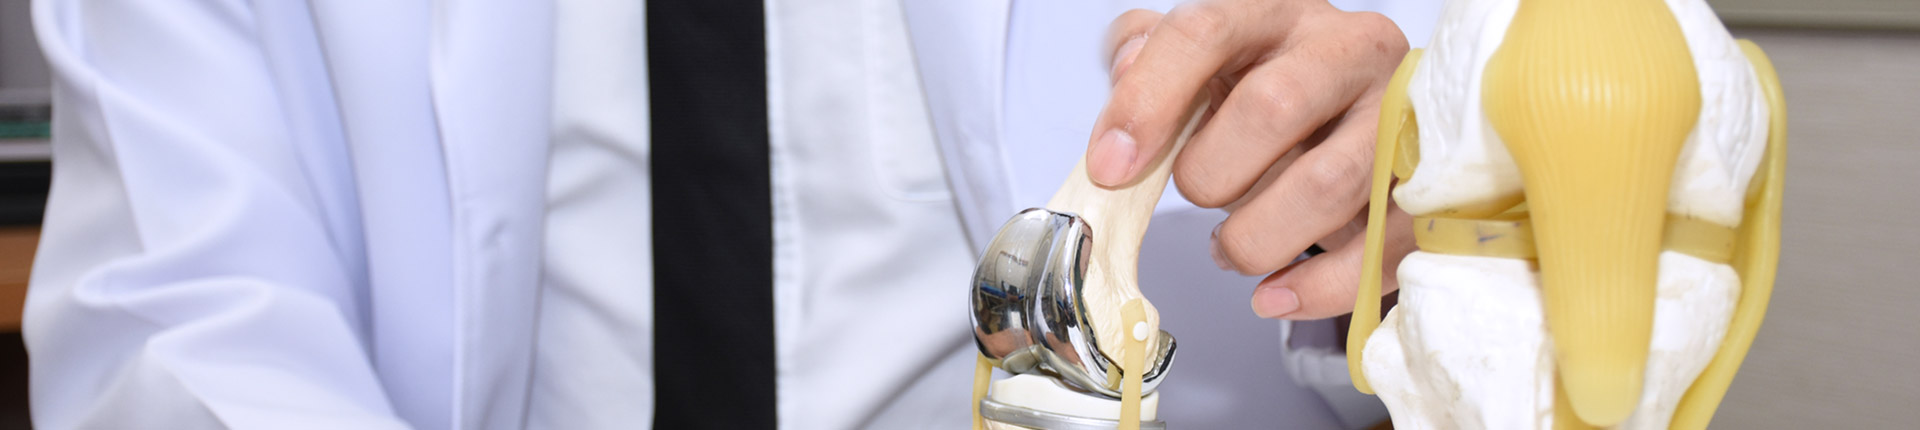
Calcium is an important mineral needed for building new bone as well as maintain existing bone strength. During joint replacement surgery, bone is removed, and an implant is put in its place. Eventually, new bone will grow around parts of the implant and help make it more stable. A diet rich in calcium can help with this process.

Importance of Food Enriched with Iron and Vitamin C

Iron is needed to build healthy red blood cells. Vitamin C improves the absorption of Iron – in other words, Vitamin C makes it easier for the Iron to get into the body and work more efficiently.  During surgery, some blood loss is expected. Ample levels of Iron and Vitamin C in your body prior to surgery will help in the replacement of red blood cells that are lost during your operation. Your surgeon may even prescribe iron supplements.

IMPORTANT NOTE: A sudden increase in your diet of green leafy vegetables can interact with certain blood thinning medications such as Coumadin (warfarin) and Plavix (clopidogrel). If green leafy foods such as spinach, broccoli and Brussel sprouts are a normal part of your diet, it is important to eat a consistent amount from week to week.

Arrival Time Information

We will contact you one business day before surgery with your arrival time.

  • You will be informed about what time to arrive. (Usually 2-3 hours prior to your actual surgery start time)
  • We will instruct you on what medications to take the morning of your surgery.
  • Be sure to shower with the Hibiclens soap the night before and the morning of surgery.

Nothing to eat or drink after Midnight the day of surgery.


    • The one exception to this is the 12-ounce bottle of REGULAR, non-diet Gatorade your surgeon wants you to drink 4 hours prior to your arrival time on your surgery day.

What to bring with you

  • Walker
  • ID and Insurance Card
  • Phone and phone charger
  • Something to do while waiting to go into surgery
  • Prescription home medications in ORIGINAL bottles
  • NEW prescription medications called in by your surgeon
  • Wear loose, comfortable clothing
  • Tennis shoes or flat rubber sole shoes
  • CPAP or BiPAP if you use one
  • Be sure to bring a vehicle that is easy to get in and out of
  • LEAVE valuables at home (jewelry, rings, piercings, etc.)

Notify your surgeon prior to arriving if you have any of the following symptoms:

  • Scrapes, scabs, rash, sores, bug bites, or any breaks in the skin anywhere on your body
  • Cold or flu like symptoms
  • COVID-19 positive (in the last 90 days)
  • Infections
  • Elevated temperature
  • Sore or scratchy throat
  • Yellow or green nasal drainage
  • Chest congestion
  • Earache
  • Nausea, vomiting, or diarrhea
  • Problems urinating

Visitors

At this time, we are only allowing one visitor on your surgery day.  (Preferably your care partner)

What to expect before surgery

  • Arrival at your provided time.
  • Check in with one of our welcoming receptionists.  They will ask you to provide your insurance card and ID.
  • One of our caring patient care techs will get your weight, height, and take you to your room.
  • We will trim hair around the operative site and clean the area with antimicrobial wipes.
  • Your pre-op nurse will have you sign the surgical consent and provide time to ask more pre-surgical questions.
  • You will change into a patient gown, intravenous (IV) fluids will be started, and preoperative medications will be given.
  • Patients may be given a disposable undergarment to prevent a wet bed as you may not have bladder sensation after surgery until the spinal anesthetic wears off.
  • Your anesthesia provider will visit you prior to your surgery.
  • Your surgeon will visit with you before surgery to answer any last-minute questions.
  • Before you receive anesthesia, monitoring devices will be applied so that the anesthesia provider can monitor and manage your vital signs — heart rate and rhythm; blood pressure; body temperature and breathing while in surgery.

Anesthesia Information

Types of Anesthesia

  • Spinal anesthesia – (preferred for joint surgery) involves the injection of a local anesthetic providing numbness, loss of pain, or loss of sensation to the body from the waist down. You will be numb for the procedure, and it will last around 1-3 hours after surgery.
  • General anesthesia – produces temporary unconsciousness.

The plan for anesthesia is usually a spinal anesthetic with deep sedation. You will be sleeping during your procedure but in most cases, you will not need a breathing tube.

Side Effects

Before surgery, your anesthesia provider will discuss the risks and benefits associated with each anesthetic option, as well as complications or side effects that can occur.

You will be given medications to treat nausea and vomiting which can sometimes occur with anesthesia. The amount of discomfort you experience will depend on several factors. Your discomfort should be tolerable, but do not expect to be totally pain free. Staff will teach you the pain scale to assess your pain level – see Understanding the Pain Scale section under Managing Pain. 

After Surgery Expectations in Recovery

  • Surgery usually lasts about 1 1/2 hours.
  • You will be taken to the Post Operative area where your pain level will be assessed, vital signs monitored, and an x-ray of your new joint may be taken.  You will recover for roughly 3-6 hours after surgery.
  • We have a process in place to update your family throughout the day.
  • Depending on the type of anesthesia used, you may experience blurred vision, dry mouth, and/or chills.
  • The nurse will start you with clear liquids and may progress your diet as tolerated.
  • You will be encouraged to drink fluids as you will need to urinate before you go home. Male patients may need to go home with a catheter if unable to urinate before discharge.
  • Numbness from the spinal anesthetic will wear off about 1-3 hours after surgery.
  • Mobility helps to relieve discomfort. It is important you begin ankle pumps to help prevent blood clots from forming in your legs.
  • Once you are able to get up, we will assist you with walking.  You will be instructed on exercises to perform at home and how to safely get out of bed and use stairs.
  • We provide something to eat that is easy to digest after surgery.  We also have a variety of snacks and drinks. If you have any specific nutritional needs or dietary restrictions, please let us know. You are welcome to bring in any special snacks you prefer.

Discharge Planning

You will be given a folder at the time of discharge with all your patient specific homecare instructions as well as a list of all the medications your surgeon wants you to take at home. Please have your support person read through this information as well when you get home.

You should expect to go directly home once discharged to recover in the privacy and comfort of your own surroundings.

When to call your surgeon

  • Uncontrolled pain not relieved by medication
  • Pain, heat, and tenderness in your calf
  • Persistent nausea and/or vomiting
  • Persistent or unexpected bleeding
  • Inability to urinate
  • No bowel movement for 3 days
  • Signs of an allergic reaction: rash, itching, or hives
  • Signs of infection:
    • Persistent fever of 101.5 or above
    • Excessive swelling, heat, drainage, or redness from the incision site
  • Any unusual or concerning symptoms
  • Shortness of breath, rapid/unusual heartbeat or chest pain → CALL 911

Incision Care

  • Follow the instructions in your discharge folder for when you can shower.
  • Dressing/incision care and expectations are also located in your discharge folder.
  • No bathtubs, hot tubs, pools, or submerging in any body of water until your incision has completely healed and given the approval by your surgeon.

Ways to manage pain

Pain control during and after surgery is likely to be one of the most common concerns of joint replacement patients. With today’s medications and pain management techniques, your pain should be tolerable.

  • Your doctor will choose the method right for you based upon your medical history, the amount of pain you are having and your phase of recovery.
  • Regardless of the pain management protocol being used, it is important for you to communicate with your surgeon if the pain medication is not sufficient, if you are feeling nauseous, or if you are not as alert as you feel you should be. Adjustments can be made to make your pain management program as effective as possible.
  • Call the surgeon’s office before going to an Emergency Department for pain! If it is after normal working hours, the after hours answering service will contact the on-call provider for you.  
    • Orthopaedic Specialists Office Phone Number: (563) 344-9292

Prevent the Pain Cycle

Pain has a cycle. It begins and increases until medication interrupts it. The aim of good pain control is to stop pain before it becomes intolerable. It is especially important to take your pain medication 30-45 minutes prior to any exercise session so that you can achieve your goals more comfortably.

  • Pain usually increases 24-48 hours after surgery.
  • Stay on a medication schedule, this will help you stay on top of your pain and keep it tolerable.
  • Take all medications with food.
  • Call the surgeon’s office for prescription refills or if there is a medication that is not working for you.

Other Methods to Decrease Pain

It is important to try to relax after your surgery and one way that may help is to listen to your favorite relaxing music, frequent position changes and applying ice or cold for 30 minutes at a time on a regular schedule to minimize your discomfort.

Daily home activities

  • Perform your post-op exercises 3 times per day unless instructed otherwise by your physical therapist.
  • Make sure you are getting up and changing positions frequently.
  • Take short walks every hour while you’re awake to prevent stiffness, blood clots, and to keep your lungs clear.
  • In addition to the above, walk at least 3 times a day for 10 minutes each time.
  • Use ice for 30 minutes every 2 hours while awake and keep foot elevated as much as possible to help reduce swelling and pain.
  • Wear white compression hose and grey compression wraps as instructed to prevent blood clots.  These are provided on the day of surgery.
  • Try to do as much as possible by yourself.  Having someone waiting on you hand and foot will only prolong your recovery goals.

Post-op Exercises

REMEMBER: It is important to plan on taking your pain medication 30 – 45 minutes prior to any exercise session so that you can achieve your goals more comfortably.

Breathing Exercises

To help prevent problems such as pneumonia, it is important to practice breathing exercises using the muscles of your abdomen and chest. Techniques such as deep breathing, coughing, and using an Incentive Spirometer may help prevent respiratory complications after surgery. Practice your breathing exercises as directed by your surgeon or nurse.

Deep Breathing

  • Breathe in through your nose as deep as you can.
  • Hold your breath for 5 to 10 seconds.
  • Breathe out as if you were blowing out a candle. Notice your stomach going in. Breathe out for 10 to 20 seconds.
  • Take a break and then repeat the exercise 10 times every 2 hours while awake.
  • An Incentive Spirometer is supplied by the surgery center on surgery day:
    • Sit upright in a chair or in bed. Hold the incentive spirometer at eye level.
    • Put the mouthpiece in your mouth and close your lips tightly around it. Slowly breathe out (exhale) completely.
    • Breathe in (inhale) slowly through your mouth as deeply as you can. As you take the breath, you will see the piston rise inside the large column. While the piston rises, the indicator on the right should move upwards between the arrows.
    • If the indicator doesn’t stay between the arrows, you’re breathing either too fast or too slow.
    • When you get it as high as you can, hold your breath for 10 seconds, or as long as possible. While you’re holding your breath, the piston will slowly fall to the base of the spirometer.
    • Once the piston reaches the bottom of the spirometer, breathe out slowly through your mouth. Rest for a few seconds.
    • Repeat 10 times every 2 hours while awake. Try to get the piston to the same level with each breath. Place the marker at the level the piston reached on your incentive spirometer. This will be your goal next time.

Bathroom Set-up

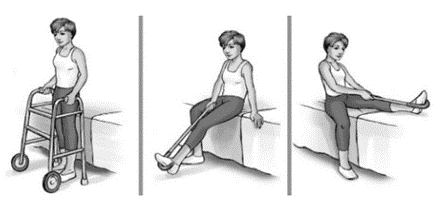
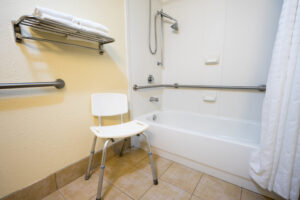
Toilet seat riser and shower chair are recommended but not required.

Raising the toilet seat height will keep you from flexing your new joint too much. You can do this by adding a seat cover, elevated toilet seat or a toilet safety frame. You can also use a commode chair instead of a toilet.

You may need to have safety bars in your bathroom. Grab bars should be secured vertically or horizontally to the wall, not diagonally.

  • DO NOT use towel racks as grab bars. They cannot support your weight.

Her are a few tips to protect yourself when you take a Bath or shower:

  • Put non-slip suction mats or rubber silicone decals in the tub to prevent falls.
  • Use a non-skid bathmat outside the tub for firm footing.
  • Keep the floor outside the tub or shower dry.
  • Place soap and shampoo within easy reaching distance so you do not need to stand up or twist.

Sit on a bath or shower chair when taking a shower:

  • Make sure it has rubber tips on the bottom.
  • Buy a seat without arms if it is placed in a bathtub.

Getting Dressed

Using a Reacher

A Reacher or dressing stick can help remove pants from your feet and off the floor.

Putting on pants and underwear:

  1. Sit down and put your surgical leg in first, followed by your non-surgical leg. Use a Reacher or dressing stick to guide your waistband over your foot.
  2. Pull your pants up over your knees.
  3. Stand with the walker in front to pull your pants up.

Taking off pants and underwear:

  1. Back up to a chair or bed.
  2. Unfasten your pants and let them drop to the floor. Push your underwear down to your knees.
  3. Lower yourself down, keeping your surgical leg out straight. Take your non-surgical leg out first followed by your surgical leg.

Using a Sock Aid

  1. Slide your sock onto the sock aid.
  2. Hold the cord and drop the sock aid in front of your foot. This is easier to do if your knee is bent.
  3. Slip your foot into the sock aid.
  4. Straighten your knee, point your toe, and pull the sock on. Keep pulling until the sock aid pulls itself out.

Using a Long-handled Shoehorn

  1. Use your Reacher, dressing stick, or long-handled shoehorn to slide your shoe in front of your foot.
  2. Place the shoehorn inside your shoe and against the back of your heel.
  3. Lean back as you lift your leg and place your toes into the shoe.
  4. Step down into the shoe, sliding your heel down the shoehorn.
  • Tips: This can be performed sitting or standing. Wear sturdy slip-on shoes or shoes with Velcro closures or elastic shoelaces. Do NOT wear high-heeled shoes or shoes without backs.

In and Out of the Car

Getting In and Out of the Car

  1. Move your car seat all the way back and recline the seat back to allow for adequate room to get in and out but remember to always have it upright for travel.
  2. Place a plastic bag on the seat to help make it easier to slide.
  3. Back up to the car until you feel it touch back of your leg.
  4. Hold on to the car seat or dashboard and slide your surgical foot out straight. Watch your head as you sit down. Slowly lower yourself into the car seat.
  5. Lean back as you lift your surgical leg into the car. You may find it helpful to use a cane, leg lifter, or other device to assist.

Using Walker & Stairs

Using Your Walker

  1. Move your walker forward.
  2. Step forward placing the foot of your surgical leg in the middle of the walker area.
  3. Step forward with your non-surgical leg putting some weight into your hands. Do NOT step past the front wheels or feet of the walker.

 Reminders:

Take small steps. Keep the walker in contact with the floor, pushing it forward like a shopping cart. If using a rolling walker, advance from basic technique to a normal walking pattern. Holding onto the walker, step forward with your surgical leg, pushing the walker as you go. Try to alternate with an equal step forward using your non-surgical leg. Continue to push your walker forward. When you first start, this may not be possible, but you will find this gets easier. Make sure that your foot does not go past the front of the walker when taking a step. Ideally, the foot should land in the center of the walker.

Using Stairs

A simple way to remember the correct sequence for stair climbing is “up with the good, down with the bad.”

What this means is that when you are climbing up the stairs, you lead with your unaffected leg, followed by the operative leg. To descend, begin down with your operative leg, followed by the unaffected leg. And always hold on to the railing!

Sitting and Standing from a Chair

Sitting Down on a Chair

  1. Back up to center of chair until you feel the chair on back of your legs.
  2. Slide the foot of your surgical leg forward, keeping your stronger leg close to chair for sitting.
  3. Reach back for the armrests one at a time.
  4. Slowly lower your body to the chair, keeping your surgical leg forward as you sit.

Standing Up from a Chair

Do NOT pull up on your walker to stand! Choose to sit in chairs with armrests.

  1. Extend your surgical leg so your knee is lower than your hips.
  2. Scoot your hips to the front edge of the chair.
  3. Push up with both hands on the armrests. If a chair does not have an armrest, place one hand on the walker while pushing off the side of chair with the other hand. Balance yourself before grabbing for the walker.

Getting in and out of Bed

Getting Into Bed

  1. Back up to the bed until you feel it on the back of your legs (you need to be midway between the foot and the head of bed).
  2. Reaching back with both hands, sit down on the edge of the bed and scoot back towards the center of the mattress. (Silk pajama bottoms, satin sheets, or sitting on plastic bag may make it easier.)
  3. Move your walker out of way but keep it within reach.
  4. Scoot your hips around so you are facing the foot of the bed.
  5. Lift your leg into bed while scooting around (if this is your surgical leg, you may use your other leg, a cane, rolled bed sheet, belt, or elastic band to assist with lifting the leg into bed).
  6. Keep scooting and lift your other leg into bed.
  7. Scoot hips toward center of bed.

Getting Out of Bed

  1. Scoot your hips to the edge of the bed.
  2. Sit up while lowering your non-surgical leg to the floor.
  3. If necessary, use a leg-lifter to lower your surgical leg to the floor.
  4. Scoot to the edge of the bed.
  5. Use both hands to push off the bed. If your bed is low, place one hand in the center of the walker while pushing off the bed with your other hand.
  6. Balance yourself before reaching for your walker.